Latest Articles
-
Auto

Getting Your Car Ready for Winter
Winter comes with some unique challenges, especially if you live in an area with snow and ice. You probably dig…
Read More » -
Business

The Technology Behind Canada Post Tracking System
Navigating the complex world of postal deliveries, Post Canada tracking systems stand out as a beacon of efficiency and reliability.…
Read More » -
Entertainment

The Top 5 Horse Races Fans Need to Watch This Year
All around the world, from Australia to the US, horse racing is one of the most popular spectator sports out…
Read More » -
Law
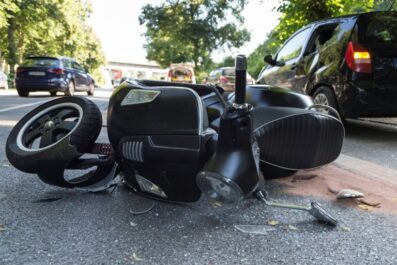
Motorcycle Passenger Injuries: Rights and Compensation
Bakersfield, California, epitomizes the essence of California living with its vibrant culture and dynamic spirit. Situated in the heart of…
Read More » -
Law

Navigating Legal Recourse for Personal Injuries in Public Transportation Accidents in Indiana
In Anderson, Indiana, where public transportation serves as a vital link for many residents, accidents involving buses, trains, and other…
Read More » -
Law

Psychological Injuries in Personal Injury Claims: Seeking Damages and Recovery
In Texas, where vehicle accidents are distressingly common, with over 250,000 injuries reported in 2023, the aftermath often extends beyond…
Read More » -
Lifestyle

The Consequences of Poisoning Birds in the UK
It’s essential to know about the legal repercussions of poisoning birds in the UK. This issue is ethically troubling and…
Read More » -
Business

How Long Will $750,000 Last in Retirement: Estimating Your Financial Longevity
Determining the longevity of your retirement savings is a critical aspect of planning your future. With $750,000 saved, you may…
Read More » -
Entertainment

5 Casino Games Rookies Should Master First
Ever thought about trying a casino? It can be a fun experience with all the sounds of slot machines, the…
Read More »